Microsoft 365 · Guest Access
How to Accept Your Microsoft 365 Guest Invitation
Updated: August 16, 2026 · Applies to: External guests invited to collaborate with Yates Enterprise Solutions · Read time: ~8 min
What to Expect
You will receive an email invitation from Damian J. Yates on the yatessbs.com domain. Before accepting, confirm these two fields in the email match what you were told to expect:
- Organization: Damian J Yates
- Domain: yatessbs.com
Microsoft adds a standard caution banner and a disclaimer stating it facilitated the email but did not validate the sender. This appears on every Microsoft 365 guest invitation from any organization — it is not specific to YES and is not itself a sign of a problem. Verify the sender and domain shown above; that is the check that matters.
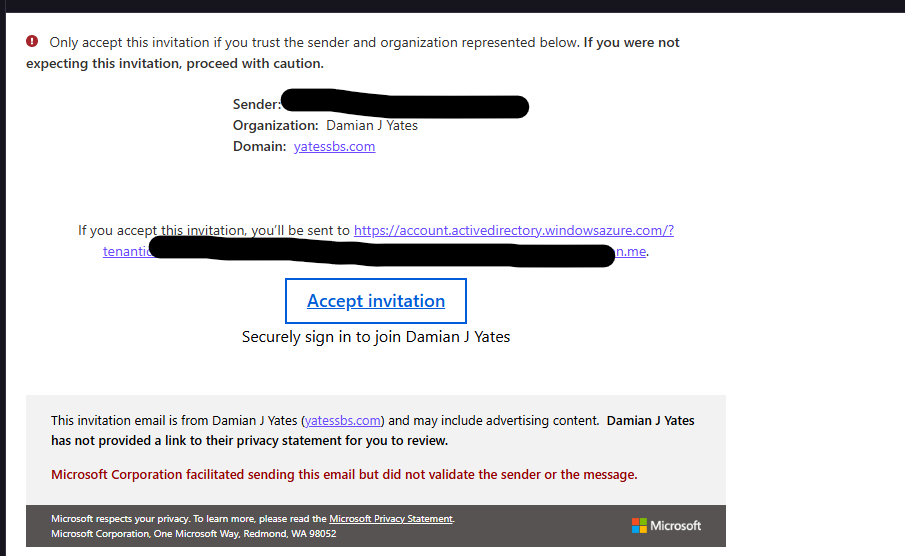
The invitation email, with sender, organization, and domain fields to verify before accepting.
Open the invitation email and select "Accept invitation." This opens a Microsoft sign-in page in your browser.
Enter the email address the invitation was sent to. If that address is already tied to a Microsoft account (work, school, or personal Microsoft/Outlook/Hotmail), sign in with your existing password and skip ahead to Step 8.
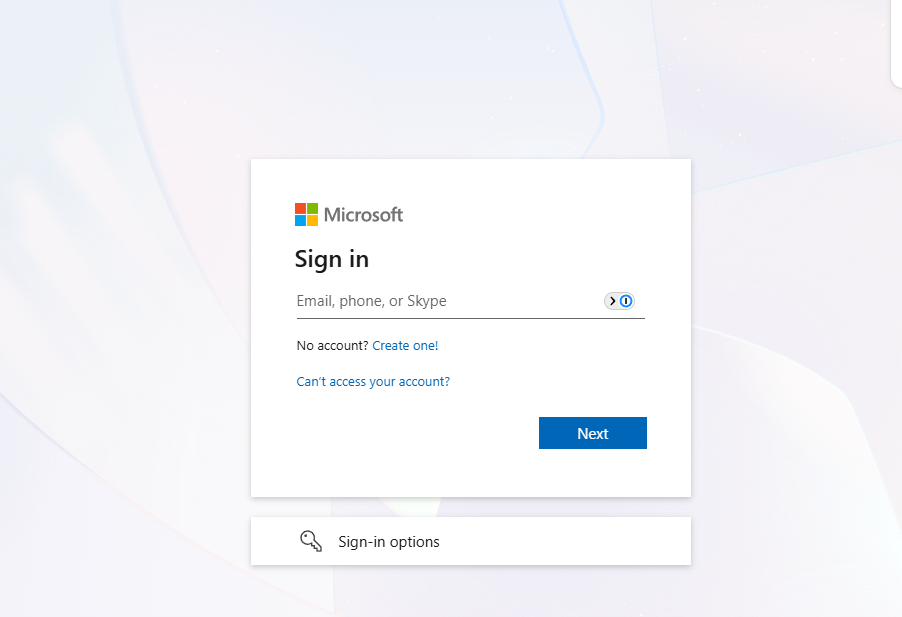
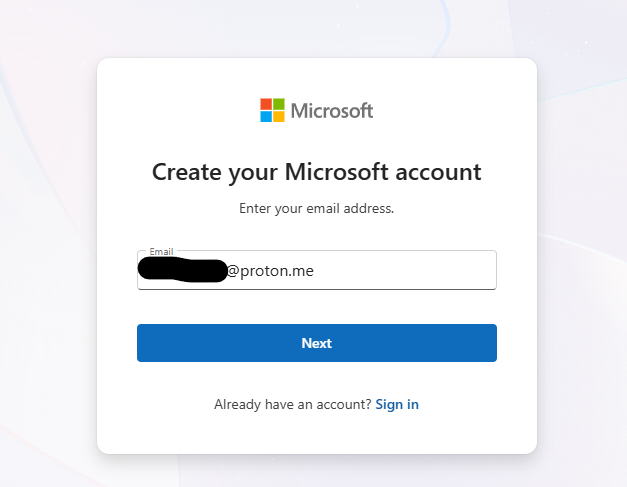
If your invited email address is not already a Microsoft account — for example, a Gmail, Proton, or other non-Microsoft address — you'll be prompted to create one. This is a free, personal Microsoft account tied to your email address; it is separate from any YES system and is not visible to or managed by YES. Select "Create one!" and continue.
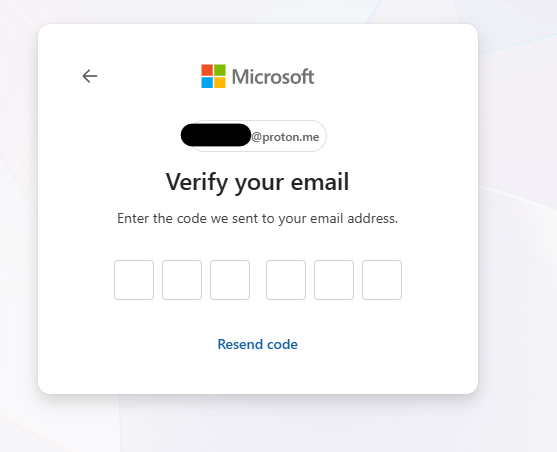
Microsoft sends a six-digit verification code to your email address. Retrieve the code from your inbox and enter it on the verification screen.
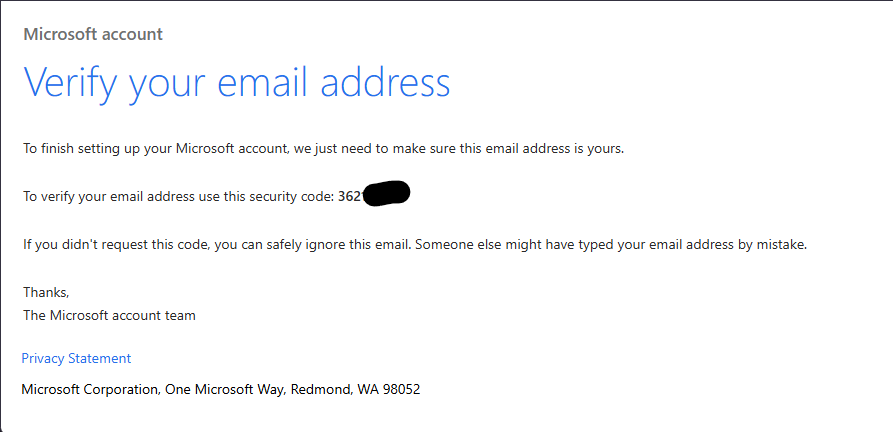
Example verification email from the Microsoft account team.
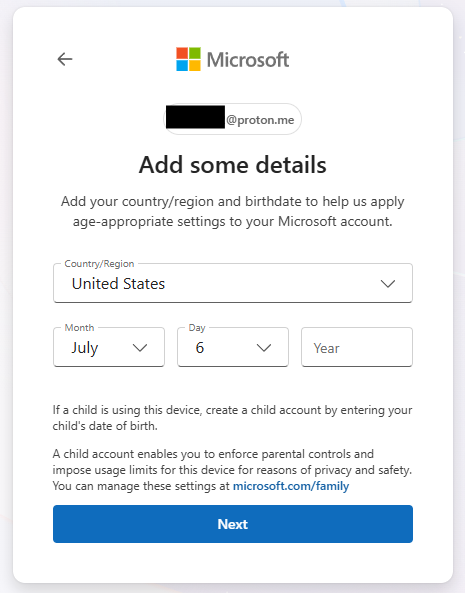
Microsoft asks for your country/region and date of birth to apply age-appropriate account settings. This information is used by Microsoft for account settings only and is not shared with YES.
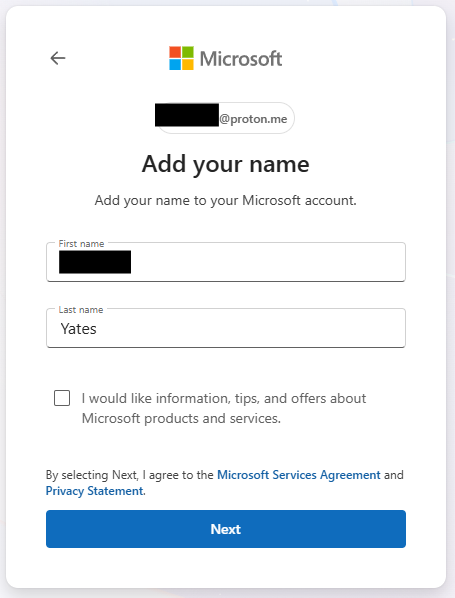
Enter your first and last name, then agree to the Microsoft Services Agreement and Privacy Statement to continue. The marketing opt-in checkbox is optional.
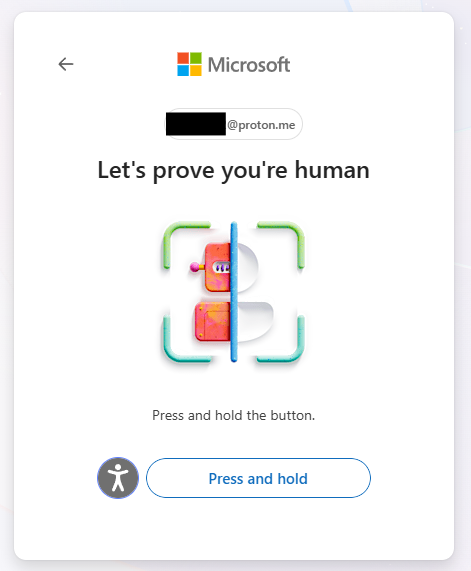
Microsoft runs a brief "prove you're human" challenge (press-and-hold or similar) to block automated account creation. Follow the on-screen prompt.
Microsoft may offer to create a passkey, letting you sign in afterward with your device's face, fingerprint, or PIN instead of a password. This step is optional but recommended — passkeys are phishing-resistant and reduce the risk of credential theft. You can decline and continue with a traditional password if you prefer.
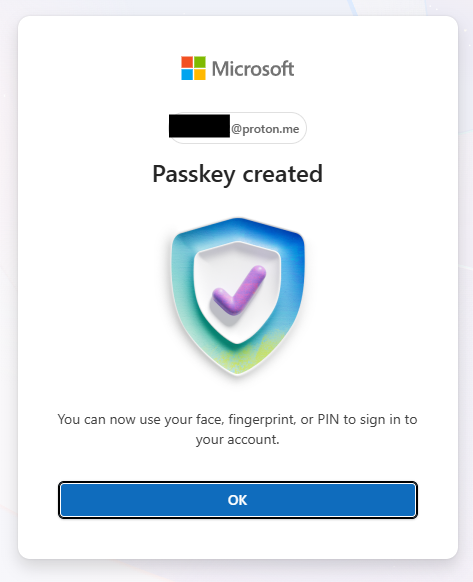
After your Microsoft account exists, you may be sent back through sign-in once more to finish joining the YES environment — and, in most cases, to set up multi-factor authentication (MFA). MFA is a security requirement that applies to every guest YES works with, not something specific to your account.
If you're returned to a sign-in screen, enter the same email address and password you just created.
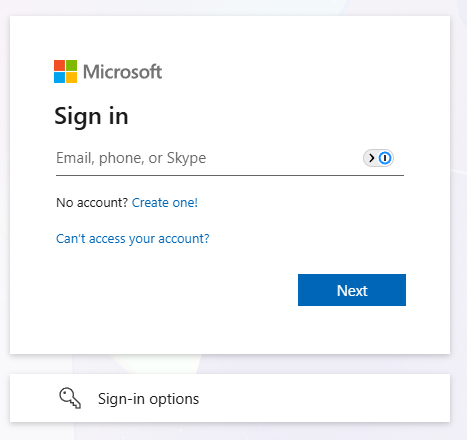
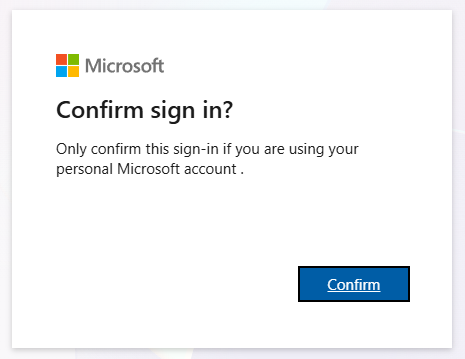
You may see a "Confirm sign in?" prompt. This appears specifically when you're using your personal Microsoft account — select "Confirm" to continue.
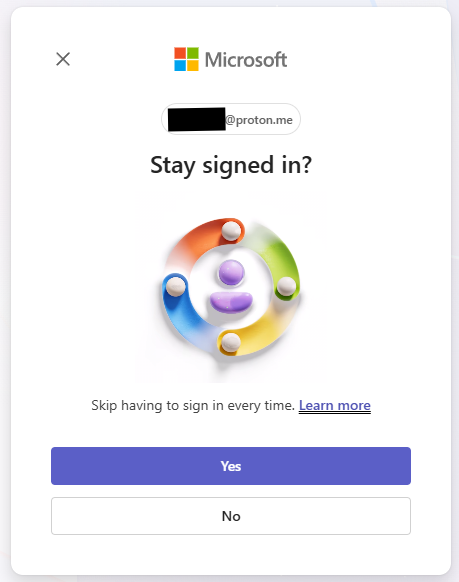
Microsoft asks if you'd like to skip signing in every time on this device. Select "Yes" on a personal device you control; select "No" on a shared or public computer.
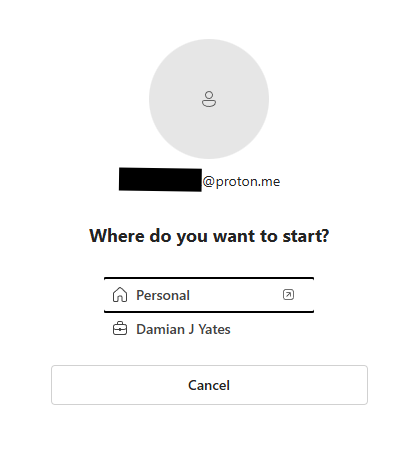
Because your Microsoft account can now access both your own personal account and the YES environment, you'll be asked where to start. Select "Damian J Yates" to continue into the YES guest environment.
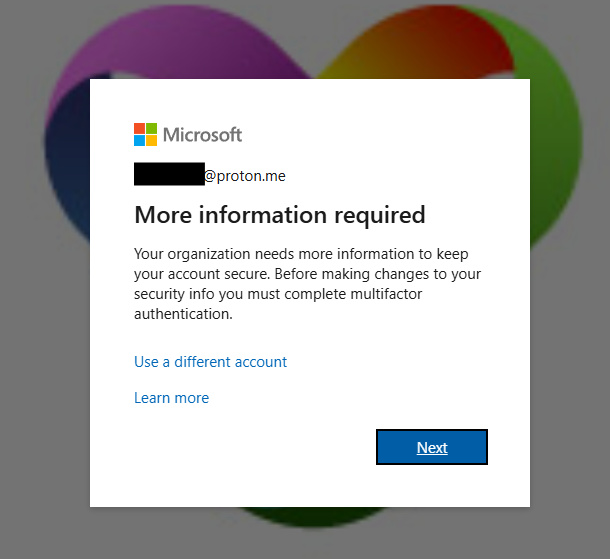
YES requires MFA for all accounts, including guests, before granting access. You'll see a "More information required" screen — select "Next" to begin setup.
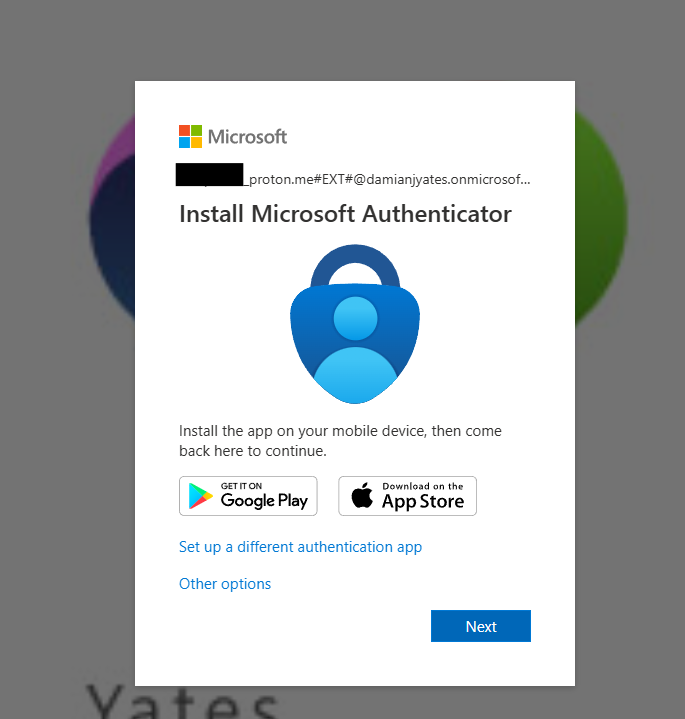
Install the free Microsoft Authenticator app from the App Store (iOS) or Google Play (Android) on your phone, then return to this screen and select "Next."
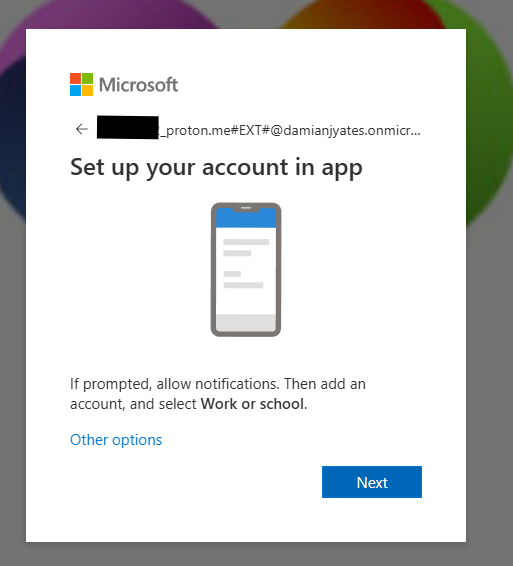
Open Authenticator on your phone. If prompted, allow notifications, then add an account and select "Work or school."
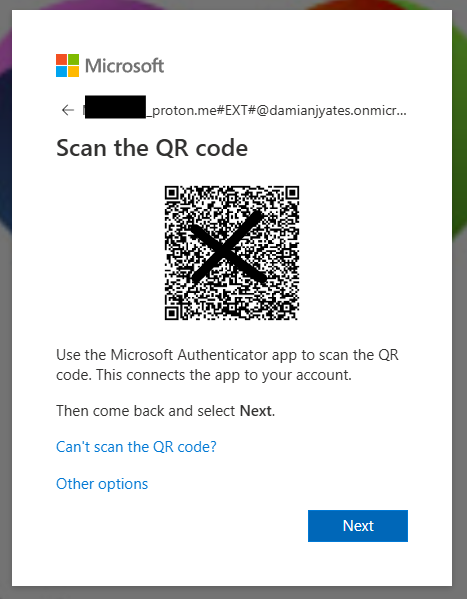
Point your phone's camera (inside the Authenticator app) at the QR code to link the app to your account. In many cases, Authenticator detects the account automatically right after installation and adds it for you — you'll see "Account added successfully" without needing to scan anything. If that happens, just select "Next" and continue.
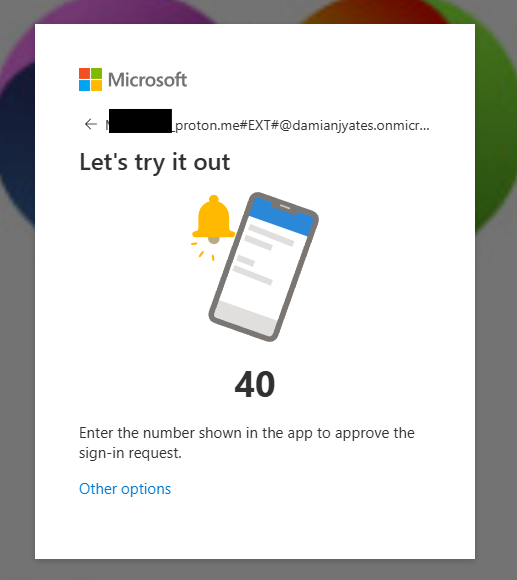
Microsoft displays a number on screen. Open Authenticator on your phone and enter that same number when prompted to approve the sign-in.
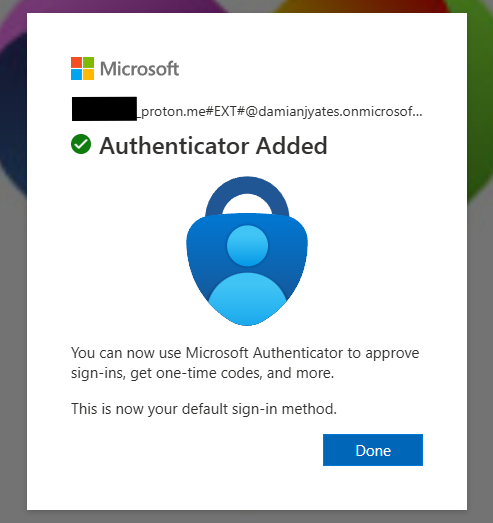
A confirmation screen shows Authenticator is now set up as your sign-in method. Select "Done."
From here, your browser will typically redirect to teams.microsoft.com. This is expected — Microsoft Teams is one of the primary tools YES uses to collaborate with guests. You may be dropped into Teams with no further action needed, or your YES contact may follow up with specific channels, files, or next steps once your access is confirmed.
Security Notes
Quick-Reference Checklist
Frequently Asked Questions
I already have a Microsoft, Outlook, or Hotmail account. What do I do?
Sign in with your existing account and password at Step 2. You can skip the account-creation steps entirely.
Do I have to give Microsoft my birthdate?
Yes, if you're creating a new Microsoft account — it's a Microsoft account-creation requirement used to apply age-appropriate settings. It is not shared with or visible to YES.
Is this invitation legitimate, or could it be phishing?
Confirm the sender, organization name, and domain match the values listed under "What to Expect." If you're unsure, reach out to your YES contact through a separate, known channel before accepting.
What access does YES have to my personal Microsoft account?
None. Guest access is scoped only to the specific files, sites, or channels shared with you — not to your personal mailbox, OneDrive, or other Microsoft services.
Do I have to set up a passkey?
No. It's offered as a more secure, convenient sign-in option, but a traditional password works fine if you'd rather skip it.
Risk Considerations
- Invitation impersonation — a lookalike domain or sender name could mimic this invitation flow. Always verify the two fields under "What to Expect" and confirm through a separate channel if uncertain.
- Shared device risk — if completing this on a shared or public computer, avoid saving the passkey to that device, or use a password instead.
- Personal account hygiene — the Microsoft account created in Step 3 is your own account going forward; normal password/account security practices apply to it.
- MFA device dependency — Microsoft Authenticator is tied to the phone used during setup. Losing that device can lock you out temporarily — contact your YES point of contact if this happens rather than creating a second account.
Need Help?
Questions about an invitation you've received, or issues completing sign-in, can be directed to YES support.
© 2026 Yates Enterprise Solutions · yatessbs.com · Article ID: YES-KB-003 · Last Updated: August 16, 2026
Was this article helpful?
That’s Great!
Thank you for your feedback
Sorry! We couldn't be helpful
Thank you for your feedback
Feedback sent
We appreciate your effort and will try to fix the article